Showing posts with label fashion. Show all posts

12/19/13

How I started my dressmaking career Part 1

When I was a little girl, I watched Cinderella for the first time and I fell in love with it.  Not because of the prince charming, the fairy godmother, or even the becoming a princess fantasy.  My favorite part was the dressmaking scene - the mice and little birds sewing a gown using odds and ends in an attic room on a dress form. It was magic! I knew instantly what I wanted to do with my life. I wanted to make pretty dresses.  It was that simple.  I didn't know how to go about accomplishing this - I didn't have a seamstress mother or aunt to guide me and teach me to sew.  I was a sheltered child of 5 years old, dreaming big dreams that involved needle and thread.  I was the middle child in a family of 9 children.  I knew early on that my dreams were my own responsibility - this was my dream - no one else's - and I would have to see it through by myself. 

So, I began gathering up knowledge and materials from any source I could.  I started with all the sewing supplies my mother owned.  These she kept in a tiny cookie tin with no lid.  There were 2 dusty spools of thread, one brown and one black, a few random buttons, and 3 tapestry needles.  If I had only known then how may wonderful types of thread and needles existed and how exciting it would be to explore this - but for me, those meager tools were my treasures.  When I asked permission to use them after explaining my need to create beautiful gowns,  my mother gasped and insisted that not only was sewing gowns too hard for me to do, it was much too dangerous for a young girl to use sharp things responsibly.  Her solution (bless her heart) was to provide me with an old skirt on a hanger and to use bobby pins and hair clips to drape the fabric this way and that.  I tried this method - and after about 5 minutes, decided it was crap and that the off- limits sewing tools were what I needed instead.  So, I swiped them, hid them in an old winter hat, and began my secret sewing adventures.  I used dolls for dress forms, pieces of pillow case and any little scraps of fabric I could find, and an old pair of yellow school scissors (try cutting fabric with those babies).  I took my little satchel of goods and hid under tables or outside beneath trees, any little place where I wouldn't be found and pieced together creations for my dollies.  I draped the fabric, stitched it, made embellishments from the scraps, I played with how the fabric could lay this way or that and experimented with symmetry and asymmetry.  Of course I was much hindered by the limited amount of fabric I had, but I made it work.  It never bothered me that the black and brown thread never matched - I worked on my stitches, making them more even and observing that if I stitched ever so carefully I could make it so that the stitches didn't even show at all, and I could hide the knots!  I was very proud of discovering this.  

My mother never found out about my secret sewing - but eventually she observed that my drive wasn't going to slow, so she asked a seamstress friend of hers to come by one day and look at the dolls clothes I had made (my mother never could figure out how I made them) and to give me some advice.  I remember that I didn't like this woman.  She had a rough way about her and I was very nervous.  But, she said that my hand stitching was very good and then continued on about how hard it was to sew prom dresses and that she did it once for her size 0 daughter and would never do it again. I thanked her and made a firm decision within myself that I would not grow up to be like this woman - crusty, hard, and uninspiring.  I could learn any skill I needed to make any fabulous garment I liked and I could do it with style, grace, and a smile on my face.


I'll continue my story in future posts.  But for now I'd like to share a video of a gown I made this past summer.  This video project was done in collaboration with Peer Canvas.  We were inspired by Marie Antoinette and the fairy princess fantasy that so many little girls have - whether that means making the dress or wearing it - or both!  


10/6/13

Custom Dressmaking Video

Here is my first ever video with Peer Canvas.  This video gives a little insight into what I do - bringing a dress from concept to creation.  I love what I do, and I'm honored to work with other artists who appreciate my work.  It is always a pleasure working with Marjorie and Brenton of Peer Canvas.  They understand the creative process and their pictures and videos show just how magical the experience of wearing a fairy tale gown can be.

The gown I am working on in this video is a chiffon a-line gown with hand - beaded detailing on the bodice.  My favorite part of making this gown was the bead work.  I hand drew the design and embroidered the "stems" of the design by machine.  I hand beaded the floral and leaf details using a combination of seed beads, pearls, and faceted beads in silver.  

3/15/13

Fun new design for flower girls

Designing little girls' dresses is always a nice departure from the more involved projects I'm usually working on.  I wanted this one to be especially fun to wear with its' very full tulle bubble skirt.  The satin bodice creates a nice contrast and I love the little buttons on the back.


https://www.etsy.com/listing/126508478/little-girls-dress-in-iris?


3/12/13

Photo Shoot

It's not every day I get to feel as though my vision is truly coming to life quite like it did yesterday during this photo shoot with the fantastic Marjorie of Peer Canvas.  This shoot featured some of my original designs, this one pictured being from my senior year of design school.  This collection was inspired by the late 19teens and Erte illustrations.  I loved the sumptuous fabrics being used during this time period, the mixing of textures, and the slinky, sexy sense of fashion that was so luxurious.

The red charmeuse slip dress is paired with an over piece of black chiffon which is hand beaded and belted at the hip in a brocade fabric.  Other items in the collection included a faux surplice slip dress, a charmeuse pants suit, and three kimono style jackets made from black satin, red brocade, and trimmed in recycled fur.


A big thank you goes out to Marjorie for her professionalism and enthusiasm.  I'd also like to thank Jessica Timmons for doing such a great job with my make up and hair.I felt like a model for just a little while.  It was a fun day and very inspiring shoot!

3/8/13

Hello!

Hello!

After an extended blog break I am finally back!  The studio has been busy and brimming with new items, ideas, and designs.  2013 is shaping up to be quite a year.  I recently entered my very first bridal show as a business all my own at Cliffbreakers in Rockford, IL. What an exciting experience!  I met lots of brides - to - be and fellow artists and business owners who have similar goals as myself.  I hope to inspire some of you with the designs I bring to life this year!

My first photo shoot of the year was a success.  I worked with make up specialist Jessica Timmons and model Kelly Bismark.  Here are some of the pics.


2/13/12

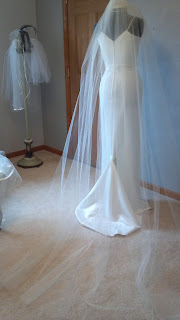
The Cathedral veil

The classic cathedral veil never goes out of style.  It can be worn alone or with a shorter style for a dramatic statement.

2/1/12

Ruby Corset


I made this corset a few months back using a favorite technique of mine - hand stamping velvet.  I created a custom stamp for the center "medallion" and embellished the piece with glass beads and swarovski crystals.  The velvet came from a skirt that was in one of my design school collections. The lining was from a dress that I was creating several muslins for.  I love deconstructing pieces and finding new ways to use the great fabric, no matter how small the scraps may be.

7/22/11

The Shapely Form

My Gothic Queen gown was included in a beautiful Etsy treasury which celebrates the shapely form us women are fortunate enough to posess. Check out the link below for some lovely inspiration.

http://www.etsy.com/treasury/NzU5NDc2Mnw0NzIxMDg2NjI/the-shapely-form

5/4/11

A beautiful and inspiring treasury

My Gothic Queen gown was included in one of the best Etsy treasuries I've seen.  If you want to be truly inspired by some rockin' gowns check out the link below.

http://www.etsy.com/treasury/4dc136ae71f96d91cc8a1b2f/gothic-evening-dresses-of-frills-and#4dc1bb5175dd8eefe446125b

2/7/11

Strapless???

When I first started as a consultant in bridal sales about 10 years ago, there was a lovely array of styles available for a bride to choose between.  The dresses were arranged from strapless to spaghetti straps, to tank, short sleeved, off-the-shoulder, and full sleeved styles. The trend in today's briday market is definitely in favor of the strapless gown.  In fact, if you are looking for anything other than strapless, you will be hard pressed to find what you are looking for.  I have had brides come to me for a custom gown simply because a strapless gown was not the style for them and the market left them little alternative.  I've made so many spaghetti straps for gowns where none were provided it does make you wonder why this demand is not supplied?

It seems quite unfair that this is the case, since when did sleeves become so passe? There are many reasons to choose a sleeved design. Lets take into consideration the weight of a bridal gown.  Depending on the syle you choose, there could be 3 to 4 to 5+ layers of fabric in the bodice alone, not to mention the skirt which will undoubtably have atleast that many. If the dress is made in satin or heavy lace, this adds to the weight.  A beaded design will add even a little more.  Without straps to support the dress on your shoulders, the requirement is heavily boned underpinnings sewn into the dress, commonly referred to as boning.  The dress will need to be anchored to your waist and kept upright by these underpinnings.  The dress also needs to be fitted to you precisely and quite snug, so there is no gapping or slipping of the bodice.

I adore a strapless dress as much as anyone, but with these considerations in mind, it is not a style for everyone.  If you would like the modesty of covered shoulders, or a little more comfort while wearing your gown or even a style that defies the norm of the industry, consider these alternatives.

Spaghetti straps - These can easily be added to a strapless gown by your alteration specialist. Straps can also be a fun way to play with the style of your gown.  You can cross them in the back, add beads or lace, even make them detachable.
Tank - This term refers to straps that are built in to the design of the dress.  It is a very comfortable option.


Halter - The straps of the gown hug the neck of the wearer.
Short or long sleeves - Of course you can choose to be very traditional with full sleeves of any number of lengths and styles.
Off the shoulder - The sleeve reveals the shoulder.

You can also make a jacket to complement your gown.  If you decide to go with a maufactured gown, see about ordering extra fabric when you place your gown order and have a jacket made for you.

Our next topic to discuss will be fabric choices.


2/6/11

A Swan Treasury

My Trumpeter Swan bridal gown was included in a fabulous Etsy treasury! Click on the link to check out a very beautiful collection of items.


http://www.etsy.com/treasury/4d4dc6bdd51a8eefa92e4171/are-you-the-white-swan-or-black-swan

2/1/11

The making of a dress - getting started

Are you ready to create a fabulous gown?  You might be wondering, where do I start?  Well, let's take this slow and explore all the options.  I will center this project around the idea of creating a bridal gown, but really, this process applies to any sewing project and certainly any dress design. 

Start by gathering pictures of gowns you like.  Whether you are inspired by the sleeve of one dress and the hem detail of another,  you should collect anything at all that interests you and make a clipping file.  This means compiling all of your ideas in one central location whether that is a fancy scrap book style page or just a spare folder.  It is so helpful to focus on what you like the most and to weed out any ideas that are lovely, but don't quite make the cut.  Review this file as many times as you wish, feel free to add any other ideas that come along and eliminate what no longer is in the running.

A great determining factor is the silhouette of gowns you are attracted to.  Silhouette refers to the shape the skirt takes in relation to how it falls on the body. 

Here are the basic silhouettes :


Ballgown  - A dress style with a very full skirt that flares out from the waist.
Aline - This style has a gradual flare that creates an "A" shape.
Straight - The skirt falls evenly around the body

Trumpet - The skirt flares from the upper thigh or the knee

Mermaid - The skirt flares at a lower point than the knee
These terms will come in helpful and are only guidelines as to dress silhouette styles.  There are many variations of these styles but this is a good foundation and will help you better communicate to the sales staff who will be trying to narrow down your search for you. 
Keep looking through those bridal magazines and have fun in the process!  Next we will discuss the pros and cons of a strapless gown.

1/28/11

The making of a dress - overview

When I was a young bride and planning my wedding, I wanted my dress to be really spectacular.  I had big plans and even bigger dreams - but I had to do it all on a very tight budget.  So I took inventory of what I had to work with.  Sewing skills - check, money - some, imagination - check, determination - double check!

Here is the result:


I designed my own gown based off the skills I was learning while earning my fashion design degree.  I took elements that were important to me in what I wanted in a gown and combined them.  I used my pattern drafting skills to create the pattern but there are a number of patterns on the market that can be altered into the style that suits you.  The biggest mistake I made was not giving myself enough time to feel calm in the process.  I think that is important.  You don't want any negative energy in the planning of your wedding.

So, am I recommending that a bride take on the extra job of creating her own bridal gown on top of everything else she has to do,  well - yes!  If you are even thinking that this is an option for you, and your wedding is well enough in the future,  it is atleast worth the time to research this option. In these tutorials I will be encouraging you to go out into the bridal shops and try dresses on to see what fits and flatters you best.  If, in the process you meet up with your dream dress - congratulations!  There are beautiful dresses available to purchase out there - you may even want to buy an already made gown and change things up a bit. Whatever you choose, I hope my advice can be found helpful.  You can save a lot of money and be extremely proud of the result. 


As complicated as making a bridal gown seems and admittedly can be, the whole process can be broken down and completed in steps.  Give yourself plenty of time and enjoy the journey.  You are gauranteed that no one else will ever have a dress like yours!

1/25/11

A hat story

A few years ago I was given a large box of old hats. These were very cool and spanned through the 40's, 50's, and 60's.   Some were in good condition, others needed a little love, and what intrigued me the most was that many were in various stages of completion.

Whoever owned these hats previously not only loved to collect them but enjoyed making them as well.  I felt quite sentimental going through it all, noticing where pins were still left in and fabric was draped, waiting to be finished at a later time and never was.  This is the kind of thing that really pulls on my heart strings. 

unfinished hats


 I've enjoyed having the opportunity to examine these hats, but felt that they would be better served if they were shared with others.  So, given the opportunity to have some fun with my millinery skills, I've been fixing them up, refinishing, and making them available to purchase through my Etsy store. 

I will continue to post pictures as more hats are finished.

1/24/11

Satin

I've decided to share a picture of a gown I did as a custom piece for a beautiful bride.  This was a ballgown done in silk satin with a removeable train.  I created a custom embroidery and beadwork design for this gown.  It is truly one-of-a-kind.

1/20/11

A new year to be inspired

I have big plans for 2011... A new year is always very exciting and full of possibilities.  But, for those times when the creativity starts to muddle, here are some ideas to get the ideas flowing once again.


For anyone who wants to be inspired on a totally new level, I strongly encourage you to check out the Montana World of Wearable Art website.  If you are feeling in a design slump, the creations presented in this show will certainly perk you right up.  http://www.worldofwearableart.com/

I am working on a project for this year's show but since it is still bubbling in my brain, I will keep the details hush hush for now.

In my lace research I have come across a great website, not only for lace but a great deal of textiles.  Be sure to check this one out, if only for the color combinations.

http://www.marlamallett.com/lace.htm

Here's hoping that 2011 is inspiring and productive for us all!

10/11/10

Unintentional blog break

My apologies for a week or so off.  I had some emergency sewing to do for an event that my family was to attend and my daughter and I needed formal dresses.  So, I dove into my stash and cozied up to my sewing machine for a while.

Here are the results...

This is myself and my cutie daughter, Lily, in our new gowns. 
Lily's dress was made out of royal purple satin.  It had a criss cross back and a circular skirt with black crinoline underskirt.

My gown was done in purple tissue taffeta.  It has a sweetheart neckline and was embellished with vintage black chantilly lace. 
I am most proud of the fact that I did not purchase anything to make these dresses except for 1 zipper.  All the other materials I had left over from previous projects.  Yay for upcycling!

9/29/10

My First Sewing Tutorial

With the school year in full swing, it is quite obvious that it seems you can never have enough clothes for your child.   They rip them, stain them, color on them.  I've sent my young one to school in brand new pants only to have them stained the very same day.  With money being tight for everyone these days, I decided to put my sewing skills to work and see what I had in our home to create some economical, and very cute, wardrobe options. 

I started with a sweatshirt project.  It is turning quite chilly here is northern IL and she was down to only one that was in reasonably good condition.  I turned to my own closet and realized I had a few sweatshirts that were plain, almost never worn, and in awesome condition.  These would be just the thing to repurpose.

Over the next few days I will recount my process of transforming an adult sweatshirt into a childs size.  Here's what you will need:

* an adult sweatshirt in good shape and preferably without any large ornamentations that will not translate well into a smaller size

* a childs sweatshirt that you don't mind cutting up to use as a pattern

* a sewing machine, hand sewing won't work very well here, with the appropriate stretch needle for your machine

* a serger, this is optional if you don't mind using other seam finishes on the inside of the garment but it will make the process much faster and your life much easier

* matching thread

Start with the preparations.  Here are some tips -

*Make use of everything you have at hand so you need as little as possible at the fabric store


It's a great idea to reuse the ribbing on the original sweatshirt.  With a seam ripper or small scissors, carefully pick out the original stitching and remove the ribbing from the desired locations; neck, sleeves, or bottom of sweater


* Next lay out the shirt to be cut as a pattern and label the front and back of the sleeve before cutting

* Now, carefully cut the shirt apart working as closely as you can to the original seam. Don't try to pick all these seams apart.  They are serged to begin with and will take a very long time to remove.


* Press all the pieces, and as you do so, check for warping in the pieces.  Knit clothing is very easily stretched and you wouldn't want this translated into the new garment.  To check for warping, fold the front and the back in half and press them, matching their shaping on the edge of the garment.  If you were making these pieces into a paper pattern, you would be trueing up lines at this point.


* Prepare the adult size in the same way and don't forget to save anthing that may be used later on or in a different project.

You are now prepped and ready for the next step.  Tomorrow - cutting the new sweatshirt!


9/21/10

The Cha-Cha dress

I LOVE these shots! This was included in the summer photo shoot and I am very happy with the results!  This dress was made from repurposed satin from a forgotten bridesmaids gown and repurposed crinoline.