I love what I do!
I mean it - I truly love the field I am working to master. It never fails to inspire me, tempt me, and drive me toward the next endeavor.
I design original pieces, I work with others to make their ideas come to life, and I alter treasured articles of clothing for those looking to celebrate a milestone in their life. I feel very blessed to be in the line of work I am in, and honored to be a part of someone's big day.
This week I hope to find the energy for all the ideas I have floating in my head to get to the next stage of their "being". I have new individuals and their gowns to meet, and I have the visions of my wonderful customers to bring to life.
Off to the studio!
3/29/10
3/28/10
Let it all soak in
Weekends are an especially important time for me. My husband, who works out of town during the week is home and we have some much needed family time. This usually includes day trips, eating great food, and mandatory relaxation for everyone. Because this has become our weekend priority, the sewing studio remains mostly closed during the weekends. But I take this down time to let the previous week set in and plan ahead for the next week's creativity.
I also get incredibly inspired during the weekend. We may visit a museum or art gallery, or even take a walk that will bring forth images of sweaters, yarn, and dress designs. These are the inspirations that feed the momentum in my creative brain space.
Thank God for the weekend.
I also get incredibly inspired during the weekend. We may visit a museum or art gallery, or even take a walk that will bring forth images of sweaters, yarn, and dress designs. These are the inspirations that feed the momentum in my creative brain space.
Thank God for the weekend.
3/26/10
Working from Stash
The term "stash" in the knitting world refers to the yarn and fiber you have stored up to use for future projects, or maybe just for the beauty of having it. I have adopted this term for my sewing purposes as well. Not just fabric, but notions, beads, trims, muslin and pattern paper. I was quite a poor college student,as most of us are, and I hated to throw away good pieces of pattern paper - it could always be used for a collar, or pocket, or something... I envisioned every lovely piece of fabric as a trim, or being fashioned into a flower notion, at the very least it could be worked into a quilt. When cutting out a project, I saved all the pieces, and threw away only the most tiny of scraps. Now, I should mention that I have no tolerance for clutter, I am not a knick knack person, and I don't like to store things that will not be used. So, I decided some time ago to bring all the little plans I had for these items to life - or they will be disposed of. In my etsy shop I have designed veils and accessories from just such scraps. And, I have plenty of ideas to go. I will try to avoid the fabric store (and yarn store too) and use up all that I have.
3/25/10
My Domestic


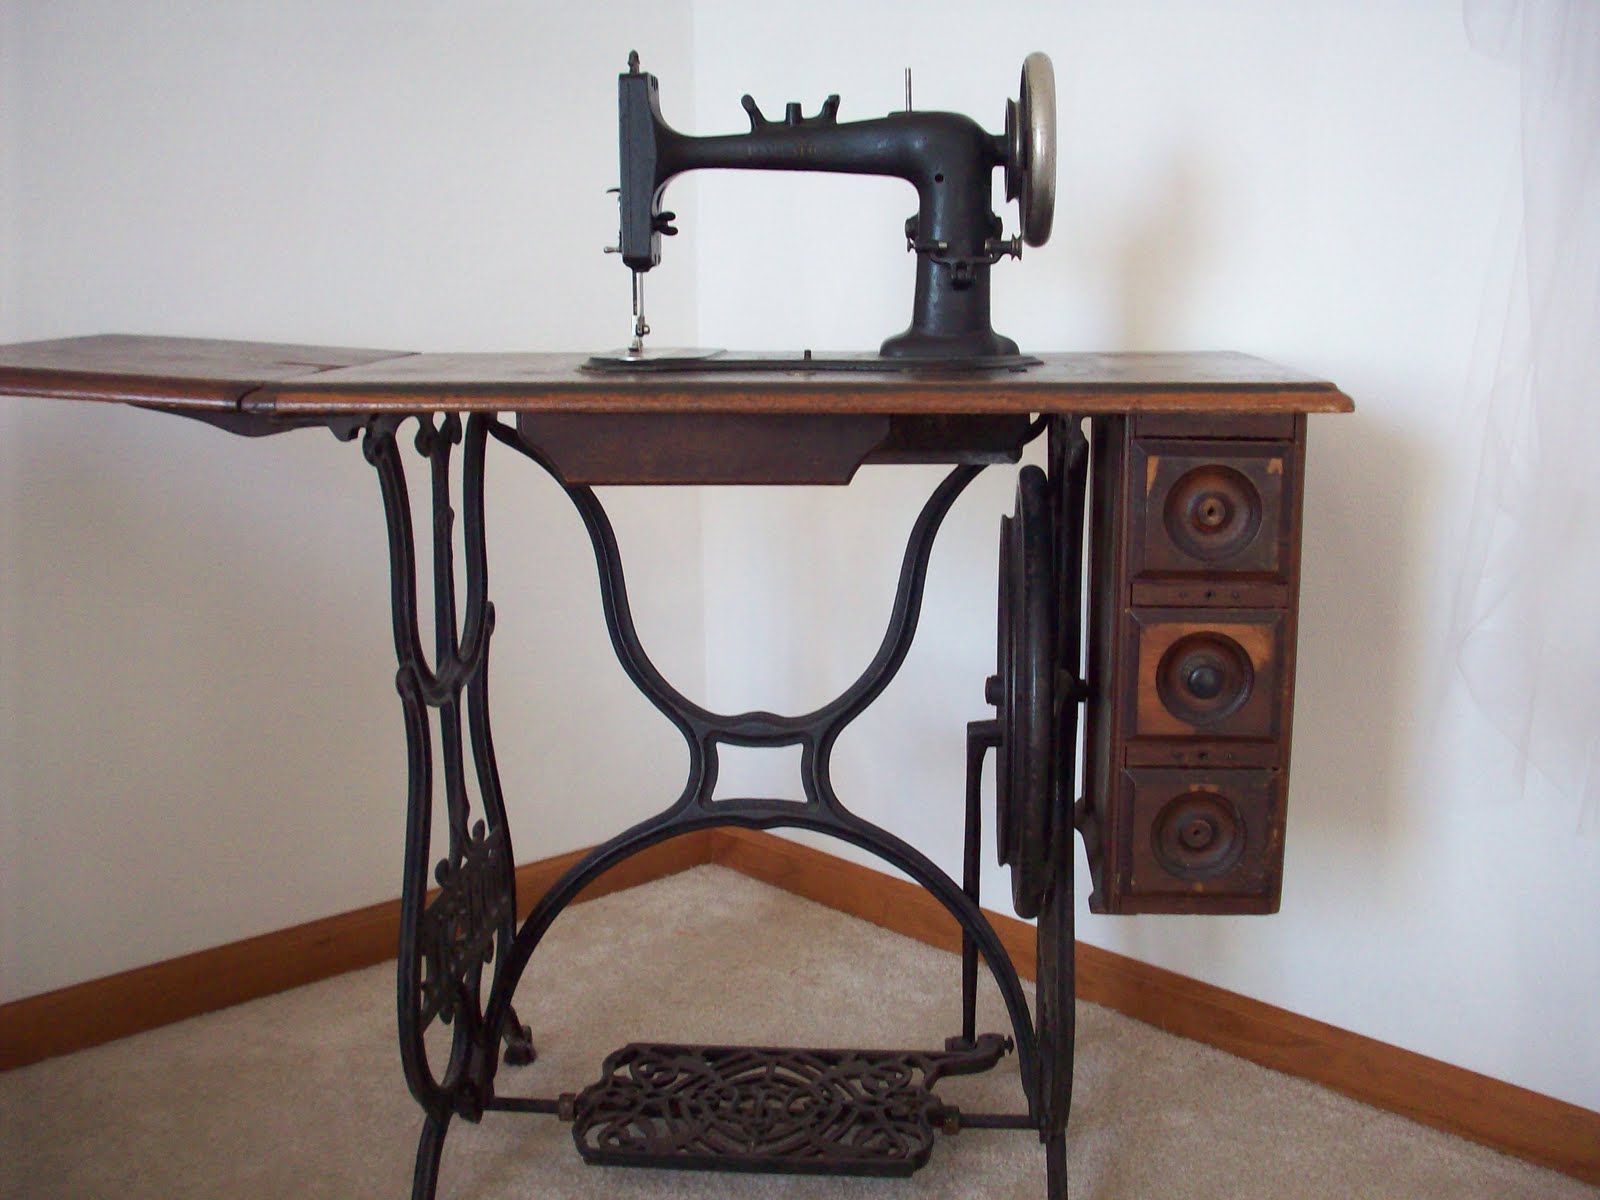
Oh my goodness how I love my old machines! They are just so cool and inspiring every time I look at them. This is my oldest machine, an 1876 Domestic. It is also in really good shape with only the drive band missing as far as I can tell. This machine uses the old shuttle style bobbin which is so beautiful and shiny as new. I bought this machine at a local antique store and when I got it home was surprised to find the drawer full of the feet and attachments! I don't have a care for the resale value, it is a treasure for me as are my other machines.
I also love the picture of the bride and groom, given to me by a client. It is an advertisement for the Domestic brand and I keep it next to my machine.
3/24/10
Vintage lovely


This is my newest addition to my vintage sewing machine collection. I love how I received this machine as much as the machine itself. It was lovingly gifted to me from a client of mine whom I was designing a bridal gown for. This machine is a 1940 White that is in perfect working condition. It is electric with the original wiring. The only component missing is a bobbin that fits properly. I love it!
3/23/10
1927 Singer
Here is my beautiful 1927 Singer sewing machine. This machine is a real family heirloom that my Great Aunt Agnes saved especially for me at the time of her passing. I cannot tell you how honored I feel to have it with me. It is in great shape as far as I am concerned and only needs the drive band replaced. I plan on getting one for it one of these days.


3/22/10
Creative recycling

I've been having fun recycling scraps from the sewing room. As I altered a gown last week, I needed to shorten the crinoline and I loved the even quality of the long scraps of net left over. So I started to play with the shape as is, no trimming or cutting. The result was a large and bunchy cabbage rose with a serged edge. I alternated with flat and gathered areas which gave the rose a less uniform and more realistic look. Best of all, there was no waste!
3/17/10
Tips for the buttonhole

When planning the placement of the buttonhole for my almost finished garment, I follow these steps so my buttonhole is successful. I try the garment on and get a basic idea of where I want it to be. I then carefully measure the area keeping everything parallel and even. I mark the buttonhole with thread because I don't care for marking pencils. Thread can always be removed and will blend in with the fabric. It is great to follow the pattern's instructions and marking for buttonhole placement. Just keep in mind that those markings should be used as guidelines and customizing your garment to be your very own is what making your own clothing is all about.

I then machine stitch the buttonhole using the style I like best from the built in stitches my machine offers. After checking to see if I am happy with the result, I carefully cut the fabric in between with a seam ripper. There is usually some fabric and interfacing visible after doing this. I trim away what I can but then I prefer to add an extra step. I handstitch the buttonhole on top of the machine stitches using a buttonhole stitch.
3/16/10
1940's suit

Here is another finished item! TADA!! I am very excited to have finished my 1940's suit from Simplicity pattern 4044. I made the pants a year ago and wore them happily. I cut the jacket out at that time, and shamefully it sat unsewn until now. I don't like any UFO's (unfinished objects), sewing or knitted so finishing this piece was very fulfilling. I wore it for the first time to work last friday and it was very comfy. The only change I made were to the pants which were very full so I tapered them in to suit me better. They are still loose and flowy but not overly so.
3/15/10
Finished Design


My original design is completely done! This was my knitting olympics project, knit by the deadline but I took plenty of time to do the finishing. This sweater features my handspun yarn, soft and smooshy merino. This top is angled in the front with 3/4 length sleeves. The lace trim is knit seperately and applied to the body pieces. I finished this design with a simple crochet edge on the neckline and a vintage button.
3/3/10
The process continues......


Here are the remaining pieces of my sweater, blocked, dry and ready to go. The bulky lace trim has very cool texture. The fronts look scarce but are improved by the trim. The sleeves differ slightly in size due to the irregularity of the handspun, but I think the blocking was forgiving.
3/2/10
designing with handspun

As much as I love designing gowns, I am equally enamoured with knitting and have been venturing into the sweater design realm. In fact, my ideas far outway my time to make them all. Well, I can say the same for my gown designs too. There is only so much time in the day. I decided to join the knitting olympics for the first time this year. I was hoping the extra pressure would help accelerate the process for me, I can knit fast but I prefer not to. Well, I did get all the pieces finished on time, but unfortunately my sweater was not blocked or finished off. I really would have preferred that it be completely done, but, I do have an original design ready to seam up and I did it in my own handspun! I have to say, it's not half bad!
I spun 16 0z of buttery soft merino wool that was a gift from my husband for Christmas. It was my first time spinning merino and the result was a lumpy and bumpy aran weight yarn. I love the yarn, and the fabric it knit up as is very interesting. Here is the back, I will post more pictures of the sweater in progress.
Subscribe to:
Posts (Atom)

